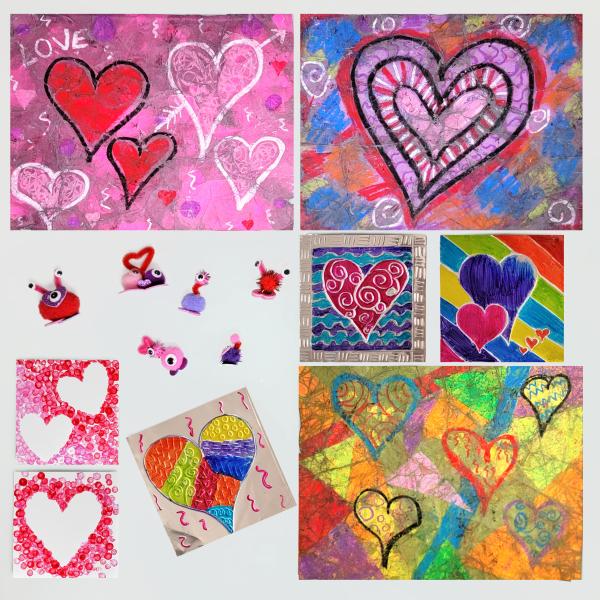
Get ready for some fun and easy Valentine’s Day crafts for kids! Here are 5 art ideas!Each project is open-ended so your young artists can put their own unique spin on it. Kids can keep the final piece of art for themselves or gift it to a friend or family member on Valentine’s Day. Ready to start crafting? Let’s get started!


Check out this free download with 13 pages of Valentine’s Day activities! There are coloring pages, mazes, and cutting activities for little ones. Plus, you’ll get a few quick writing activities that are great for early elementary kids. There’s even a tic-tac-toe game! Simply download the PDF, print the pages you’d like to use, and sit down with your children for some Valentine’s Day fun!

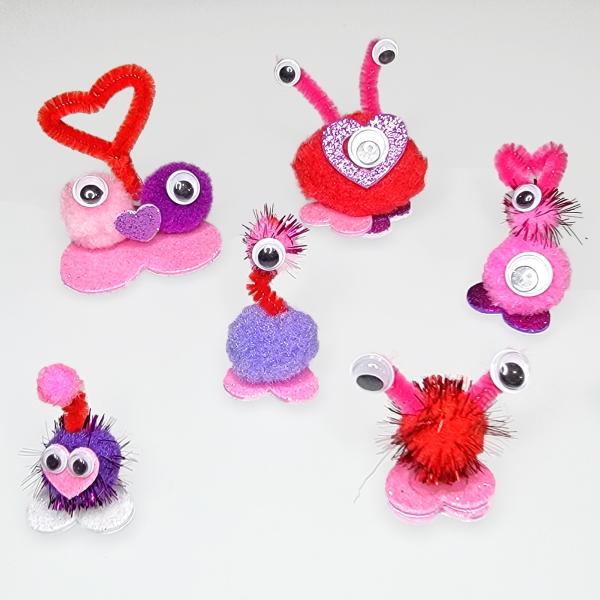
These fuzzy love bugs are a quick no-prep Valentine’s Day craft for kids. Make a bunch and hand them out to friends!
What You’ll Need: hot glue gun (Adult use only!), pom-poms (various colors like red, pink, white, and purple), pipe cleaners (various colors like red, pink, white, and purple), foam hearts, and googly eyes.
What You’ll Do:
1. Glue a pom-pom on top of a foam heart.
2. Make antennae out of pipe cleaners and glue them to the pom-pom. You can cut the pipe cleaners to size or curl them around the end of your finger or a pencil. Or, twist the pipe cleaner into a heart!
3. Glue googly eyes to the antennae or to the pom-poms.
4. Add smaller pom-poms or foam hearts to the bug as decoration.

With this open-ended art project, kids will get to use oil pastels and the batik technique, a method that’s borrowed from an ancient fabric dyeing technique in Indonesia.
What You’ll Need: cardstock, oil pastels, black tempera paint, water, medium-sized bowl, spoon, art tray or old baking sheet, and paper towels.
What You’ll Do:
1. Begin by coloring the cardstock with oil pastels. Draw a few hearts and make sure to fill in the entire paper with color.
2. Crumple the paper into a ball and then unroll it. Repeat this three times. During the final time, leave paper crumpled in a ball.
3. Mix black tempera paint and water in a 1:1 ratio in a medium-sized bowl. Place the bowl near a sink.
4. Dip the crumpled ball of paper into the paint mixture. Pull the ball of paper out and give it a rinse by quickly running it under water. Place it on an art tray or old baking sheet.
5. Carefully unroll the ball of paper and use paper towels to dab off the extra paint mixture.
6. Leave the paper on the art tray or old baking sheet to dry.

Kids create a unique and colorful piece of Valentine's Day art with this simple embossing project!
What You’ll Need: pencil, colored pencil, 36-gauge aluminum tooling foil or embossing foil, square paper that matches the size of your foil, piece of scrap foam or cardboard, tape (optional), and permanent markers in a variety of colors.
What You’ll Do:
1. Begin by drawing a design on the square paper with a pencil. Use hearts, patterns, and whatever designs you’d like!
2. Set the foam or cardboard in front of you on a table. Place the foil on top of that and place the paper you designed on the very top. (You might want to tape it together so it stays put!)
3. Draw over your designed paper using a colored pencil. This will help you keep track of what you’ve already embossed. Go over the entire design. As you do, you’ll be embossing it into the foil!
4. Turn over the foil so the raised part of the design is facing up. Color with permanent markers.

No paintbrushes needed here! Kids use cotton swabs to dab paint onto a canvas and reveal a white heart in the final step.
What You’ll Need: construction paper, scissors, pencil, painter’s tape or washi tape, mini canvas, cotton swabs, acrylic paint, and paper plate or paint palette.
What You’ll Do:
1. Fold the construction paper in half and draw half of a heart shape on the fold. Cut it out, unfold the paper, and you have a heart! You can make one large heart or a few smaller hearts for this project.
2. Use tape to attach the heart(s) to the canvas. You’ll need to loop the tape and place it under the heart so that no tape extends beyond the heart. Try to make the heart as secure as possible, creating a crisp edge so no paint gets underneath it.
3. Pour your paint into a paint palette or onto a paper plate. Dip a cotton swab in one color and dab it on the canvas. Use a variety of colors and dab all around the canvas. Continue doing this until you’re happy with how the canvas looks.
4. Allow the paint to dry. Then remove the construction paper and you’ll see a crisp white heart on the canvas!


